Set up outgoing e-mail address
This tutorial will guide you through the steps required to set up sending emails with invoices from your own e-mail address using Fenerum.
Warning
Fenerum can only send e-mails from address in your company domain. No addresses in public mailboxes allowed (i.e @gmail.com).
To configure your outgoing e-mail address, follow the three-step guide below.
Setting up
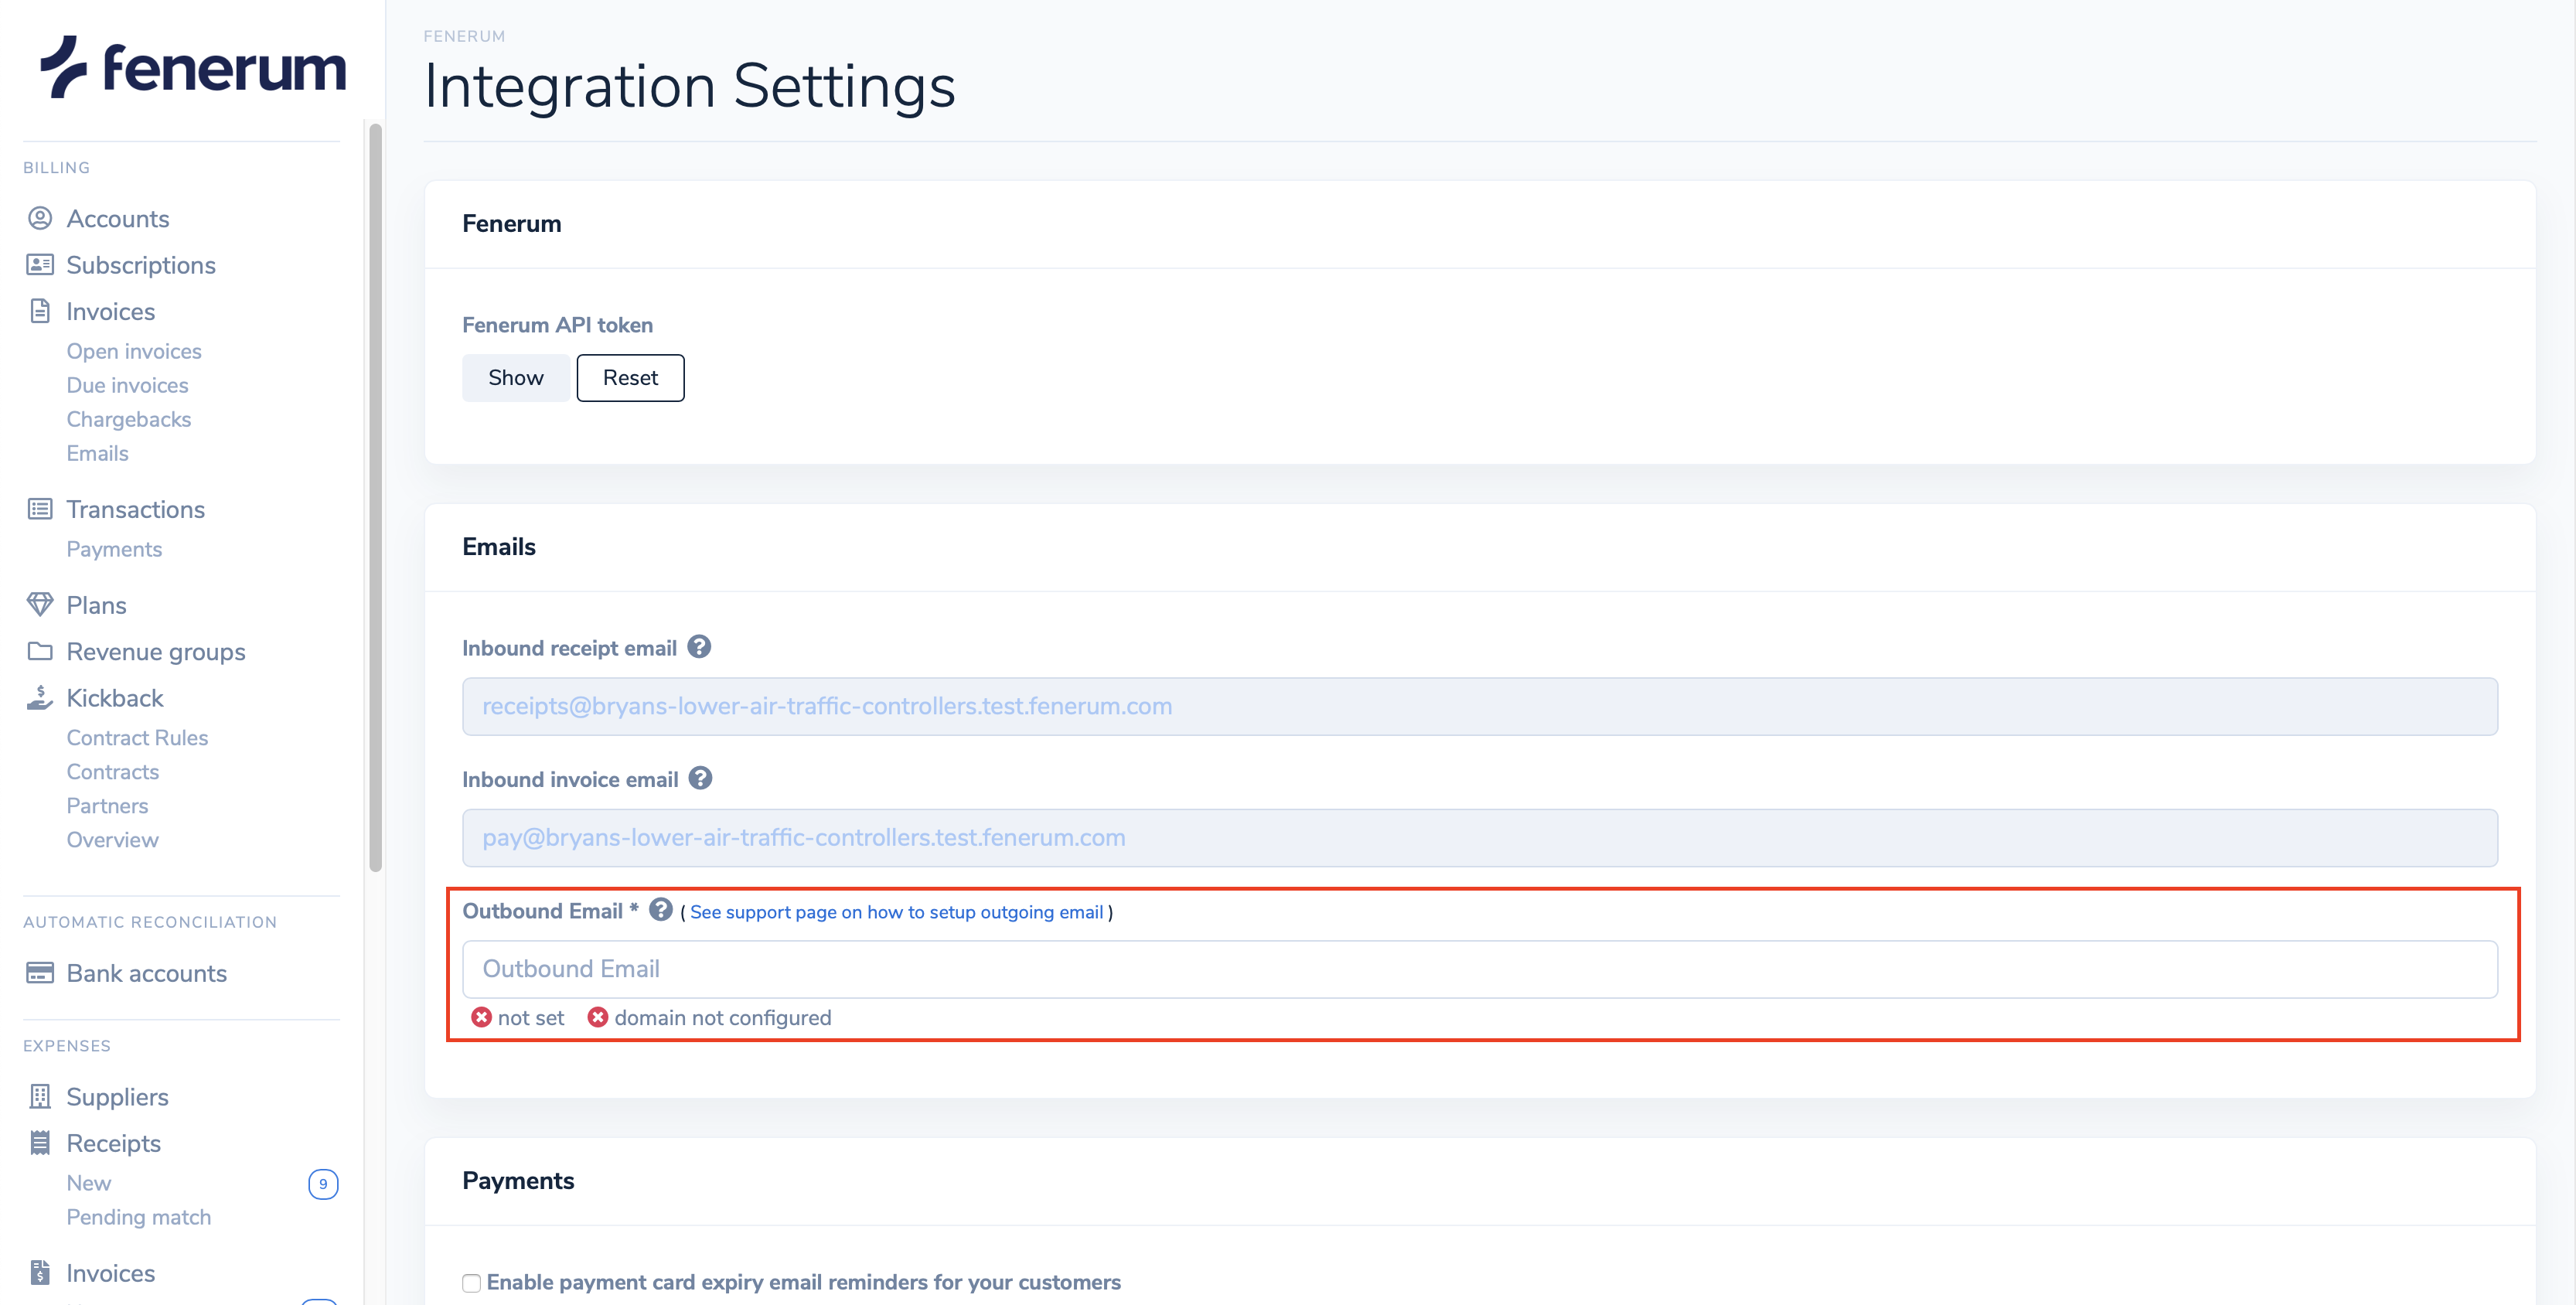
1. Set up the outbound e-mail address
In order to start using your e-mail address for sending Fenerum emails, head over to Integration settings, fill in the Outbound Email field and click the Save button.
2. Confirm your e-mail address
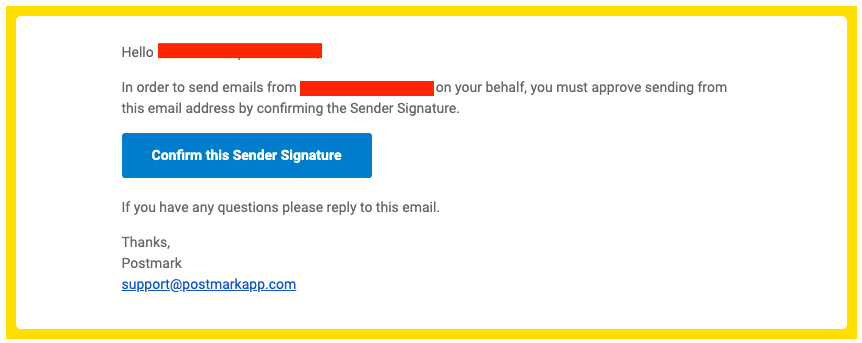
Fenerum is using Postmark for sending e-mails. Before it will be able to send e-mails on Your behalf You will need to confirm the address by clicking on link received on that mailbox.
Confirmation e-mail will be sent to You when creating account on Fenerum.
You should receive e-mail address similar to the one on the screenshot:
 You can see the confirmation status on your e-mail in Fenerum Integration settings page.
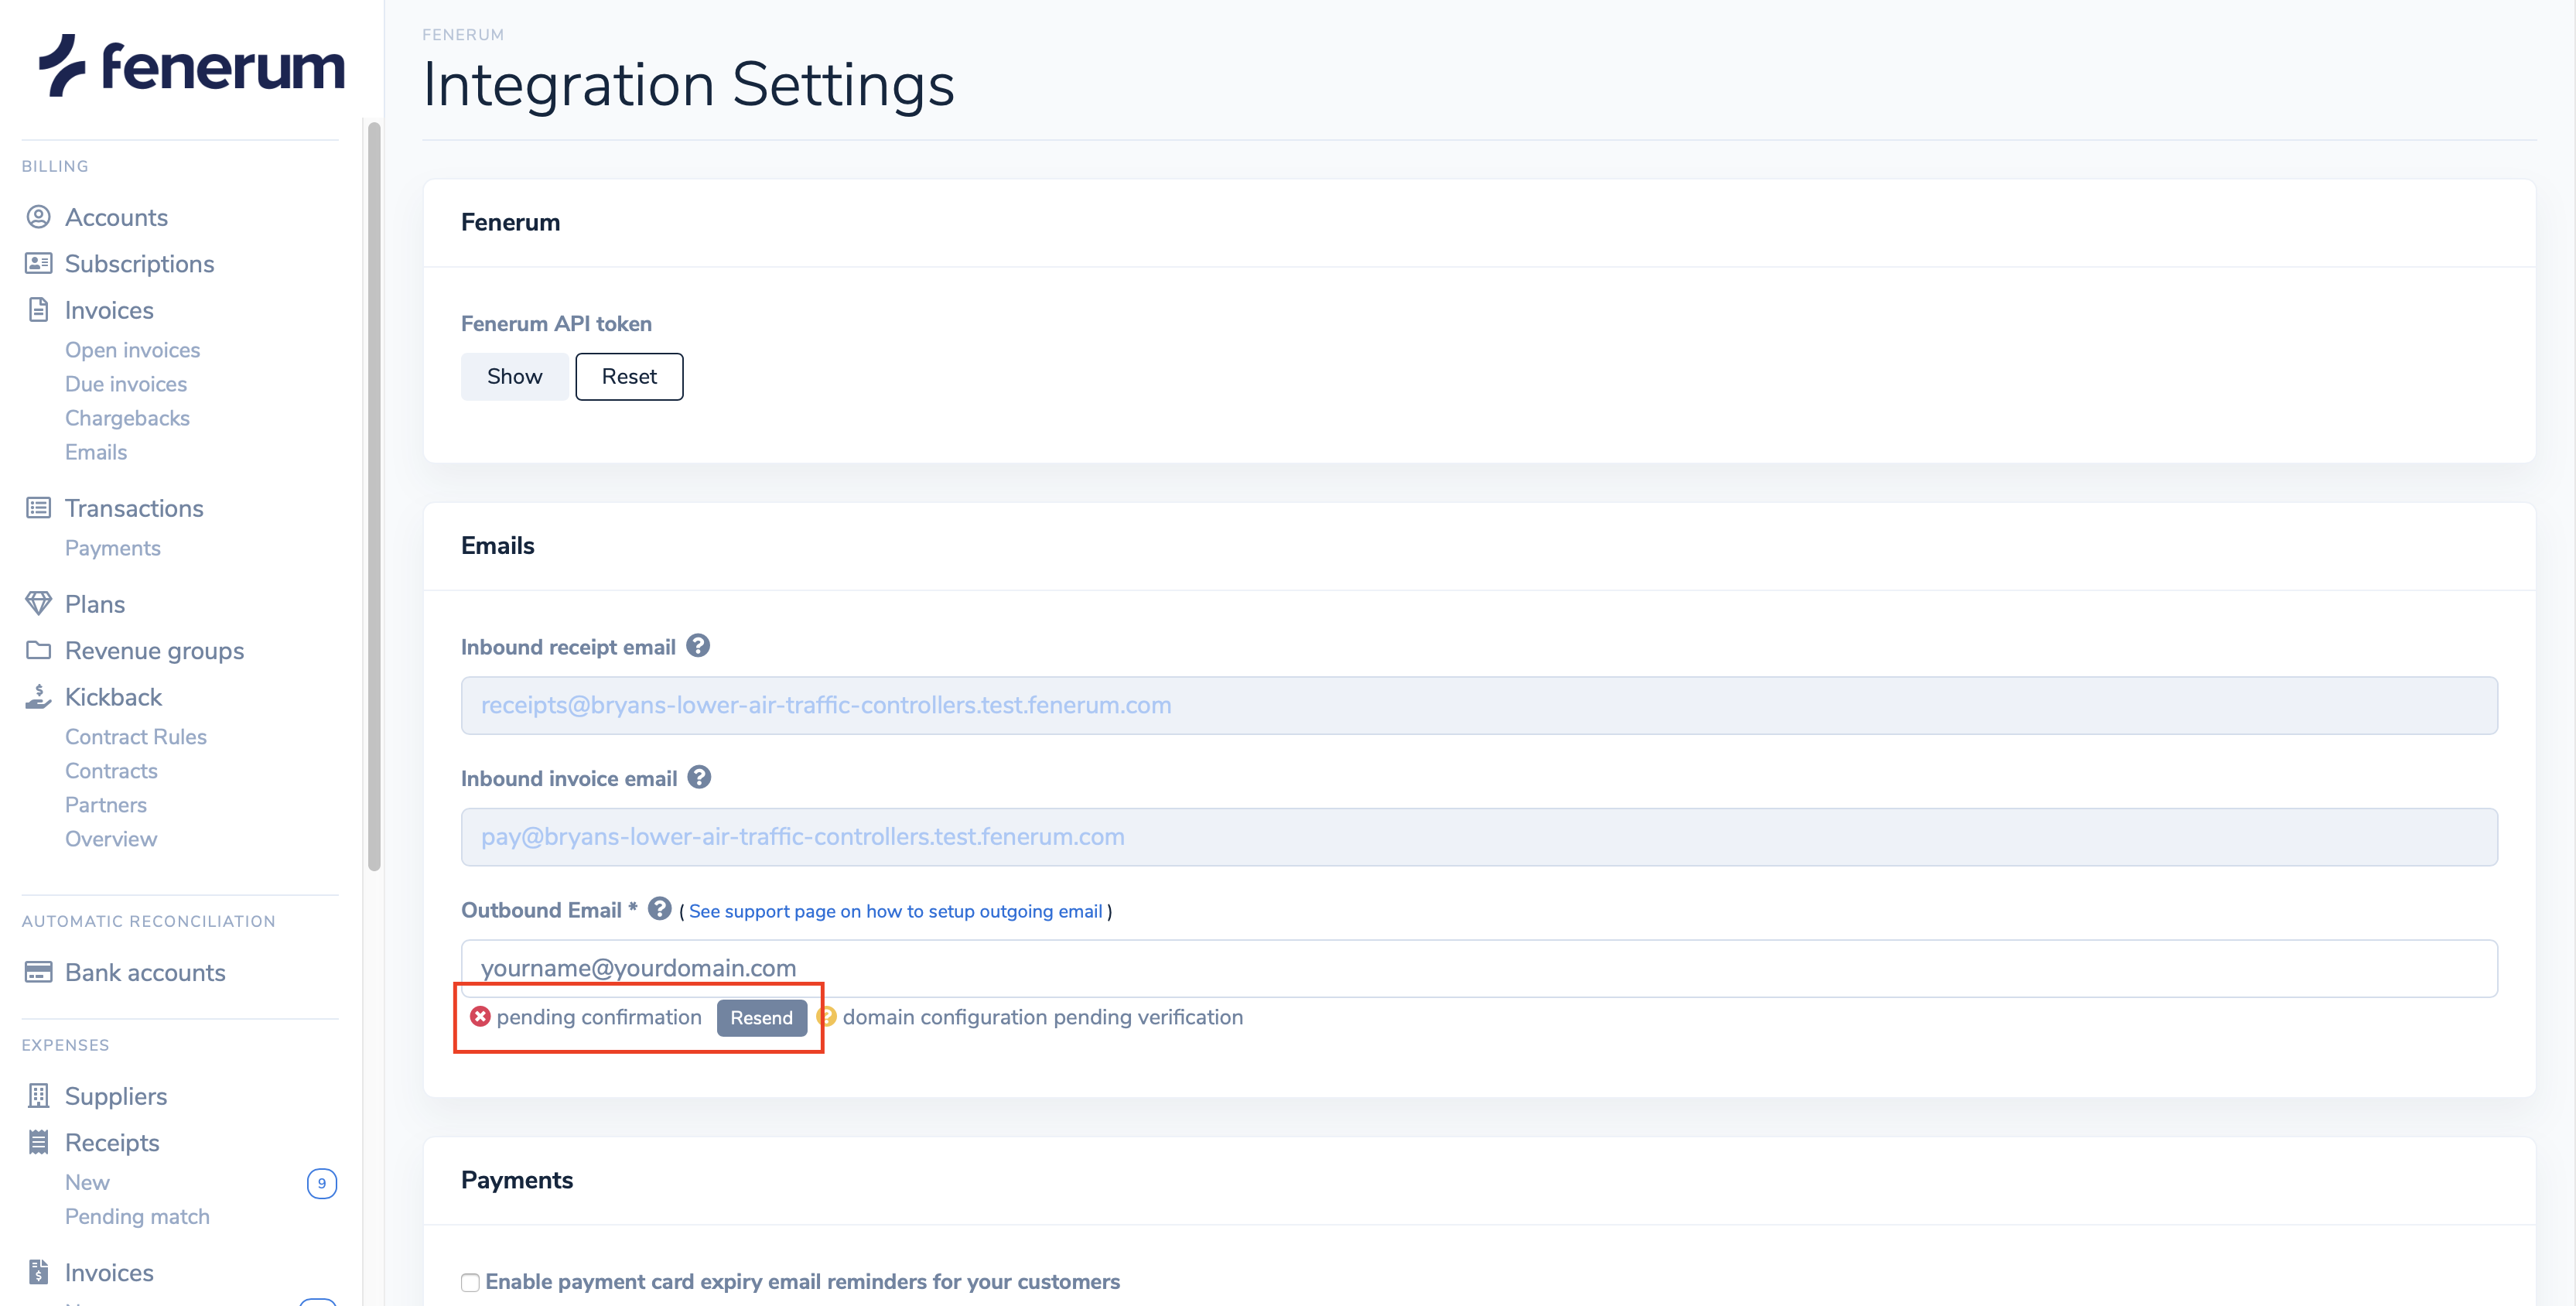 If You haven't received Your confirmation e-mail you can click on "Resend" button to send it once again.
If You have changed your e-mail address Postmark will send confirmation e-mail to the new address.
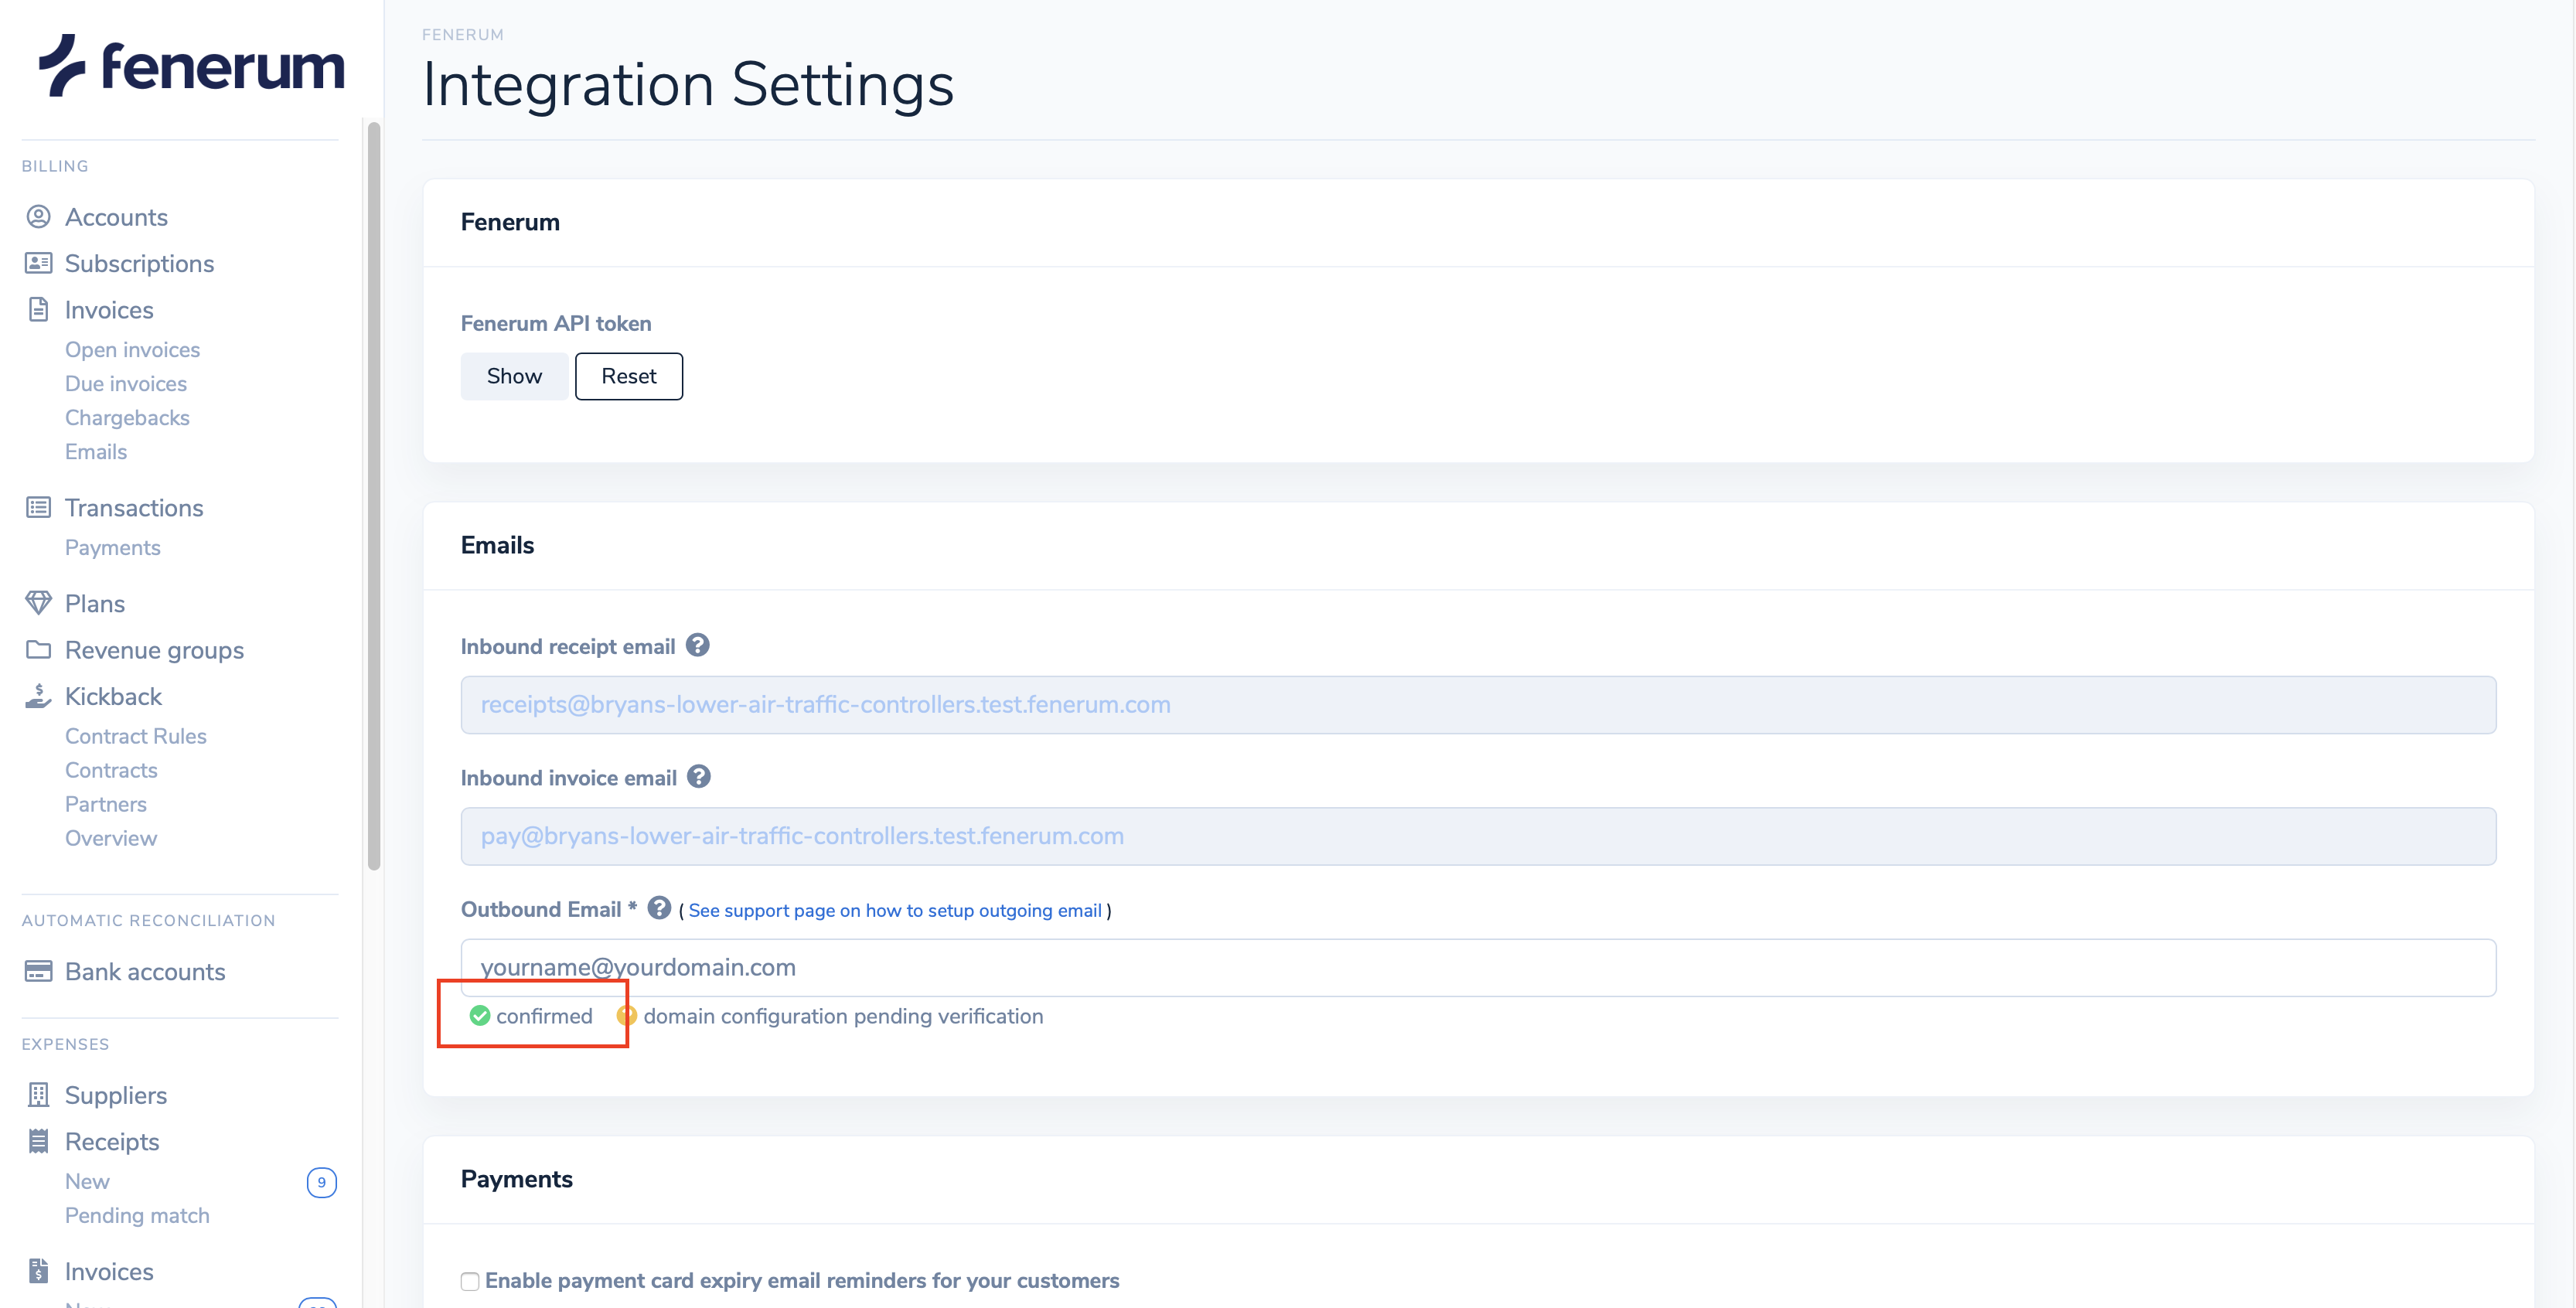
After confirming the address with Postmark the status will be updated in Fenerum. It can take up to 10 minutes to refresh status.
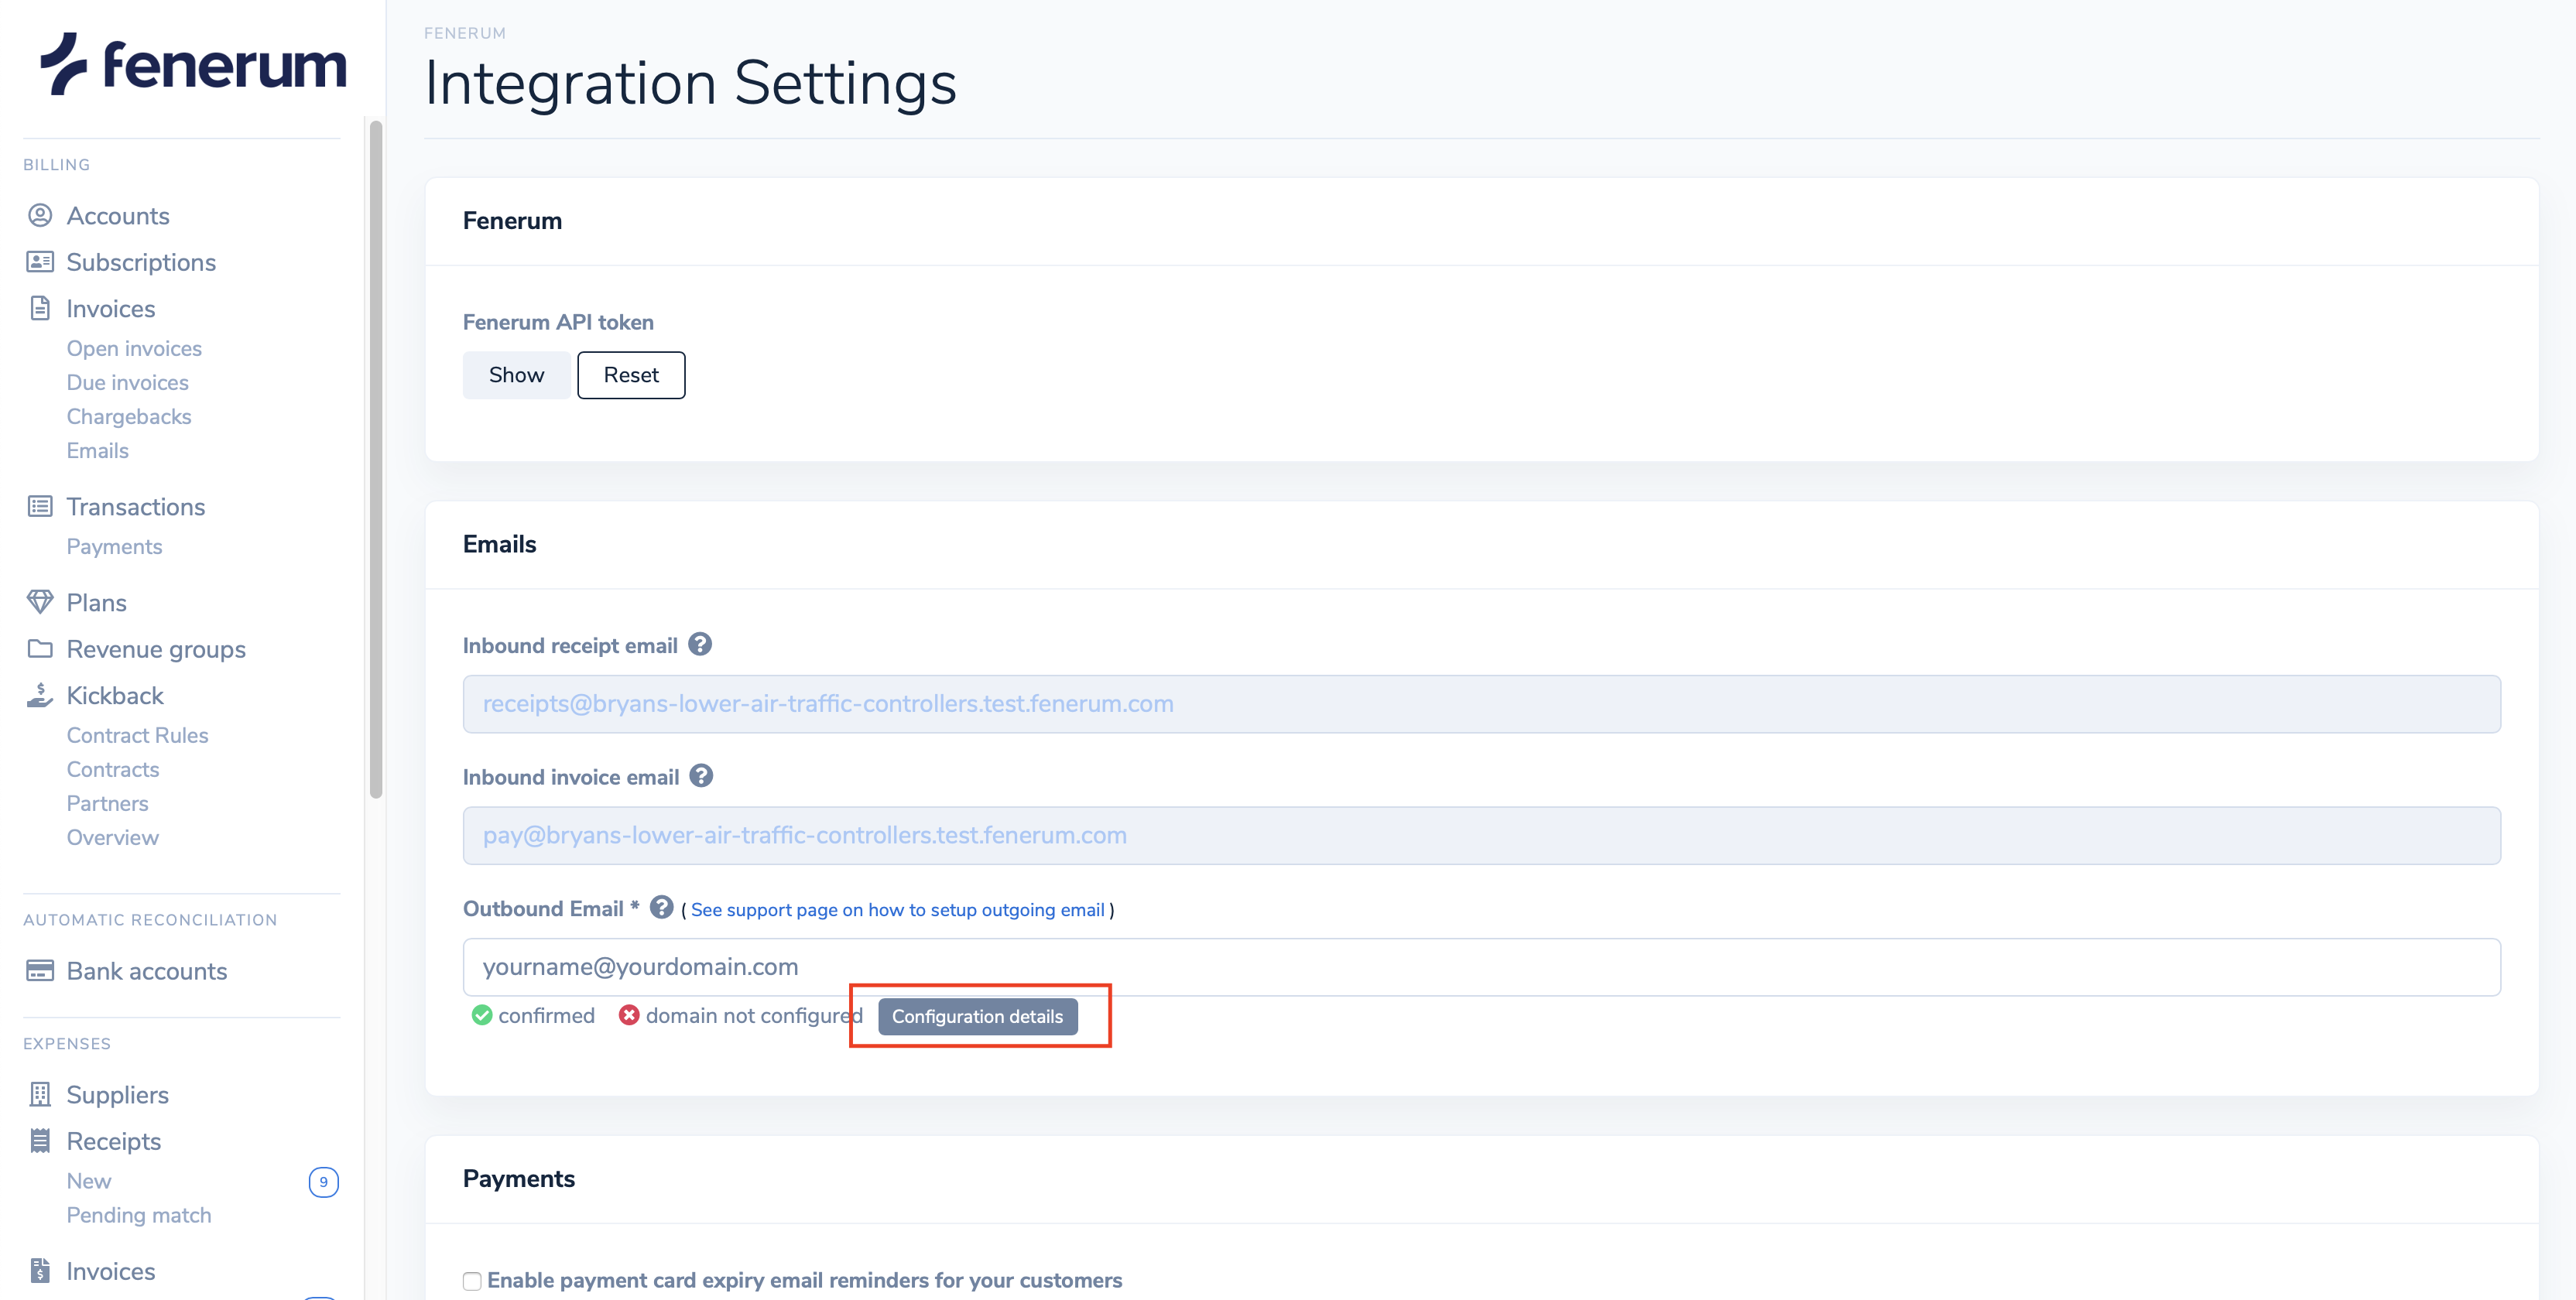
3. Configure your domain
To provide the best e-mail deliverability your domain needs some additional configuration. We use the DKIM authentication method to ensure that receivers of e-mail messages recognize your e-mail address as a legitimate sender.
A few minutes after adding your outbound e-mail address, the domain configuration status will be displayed in the Integration settings page. If it says "domain not configured", click the "Configuration details" button.
 Clicking this button will display a pop-up with technical details for adding a DKIM DNS record to the DNS zone of your domain. Follow the guide displayed in the pop-up and close it.
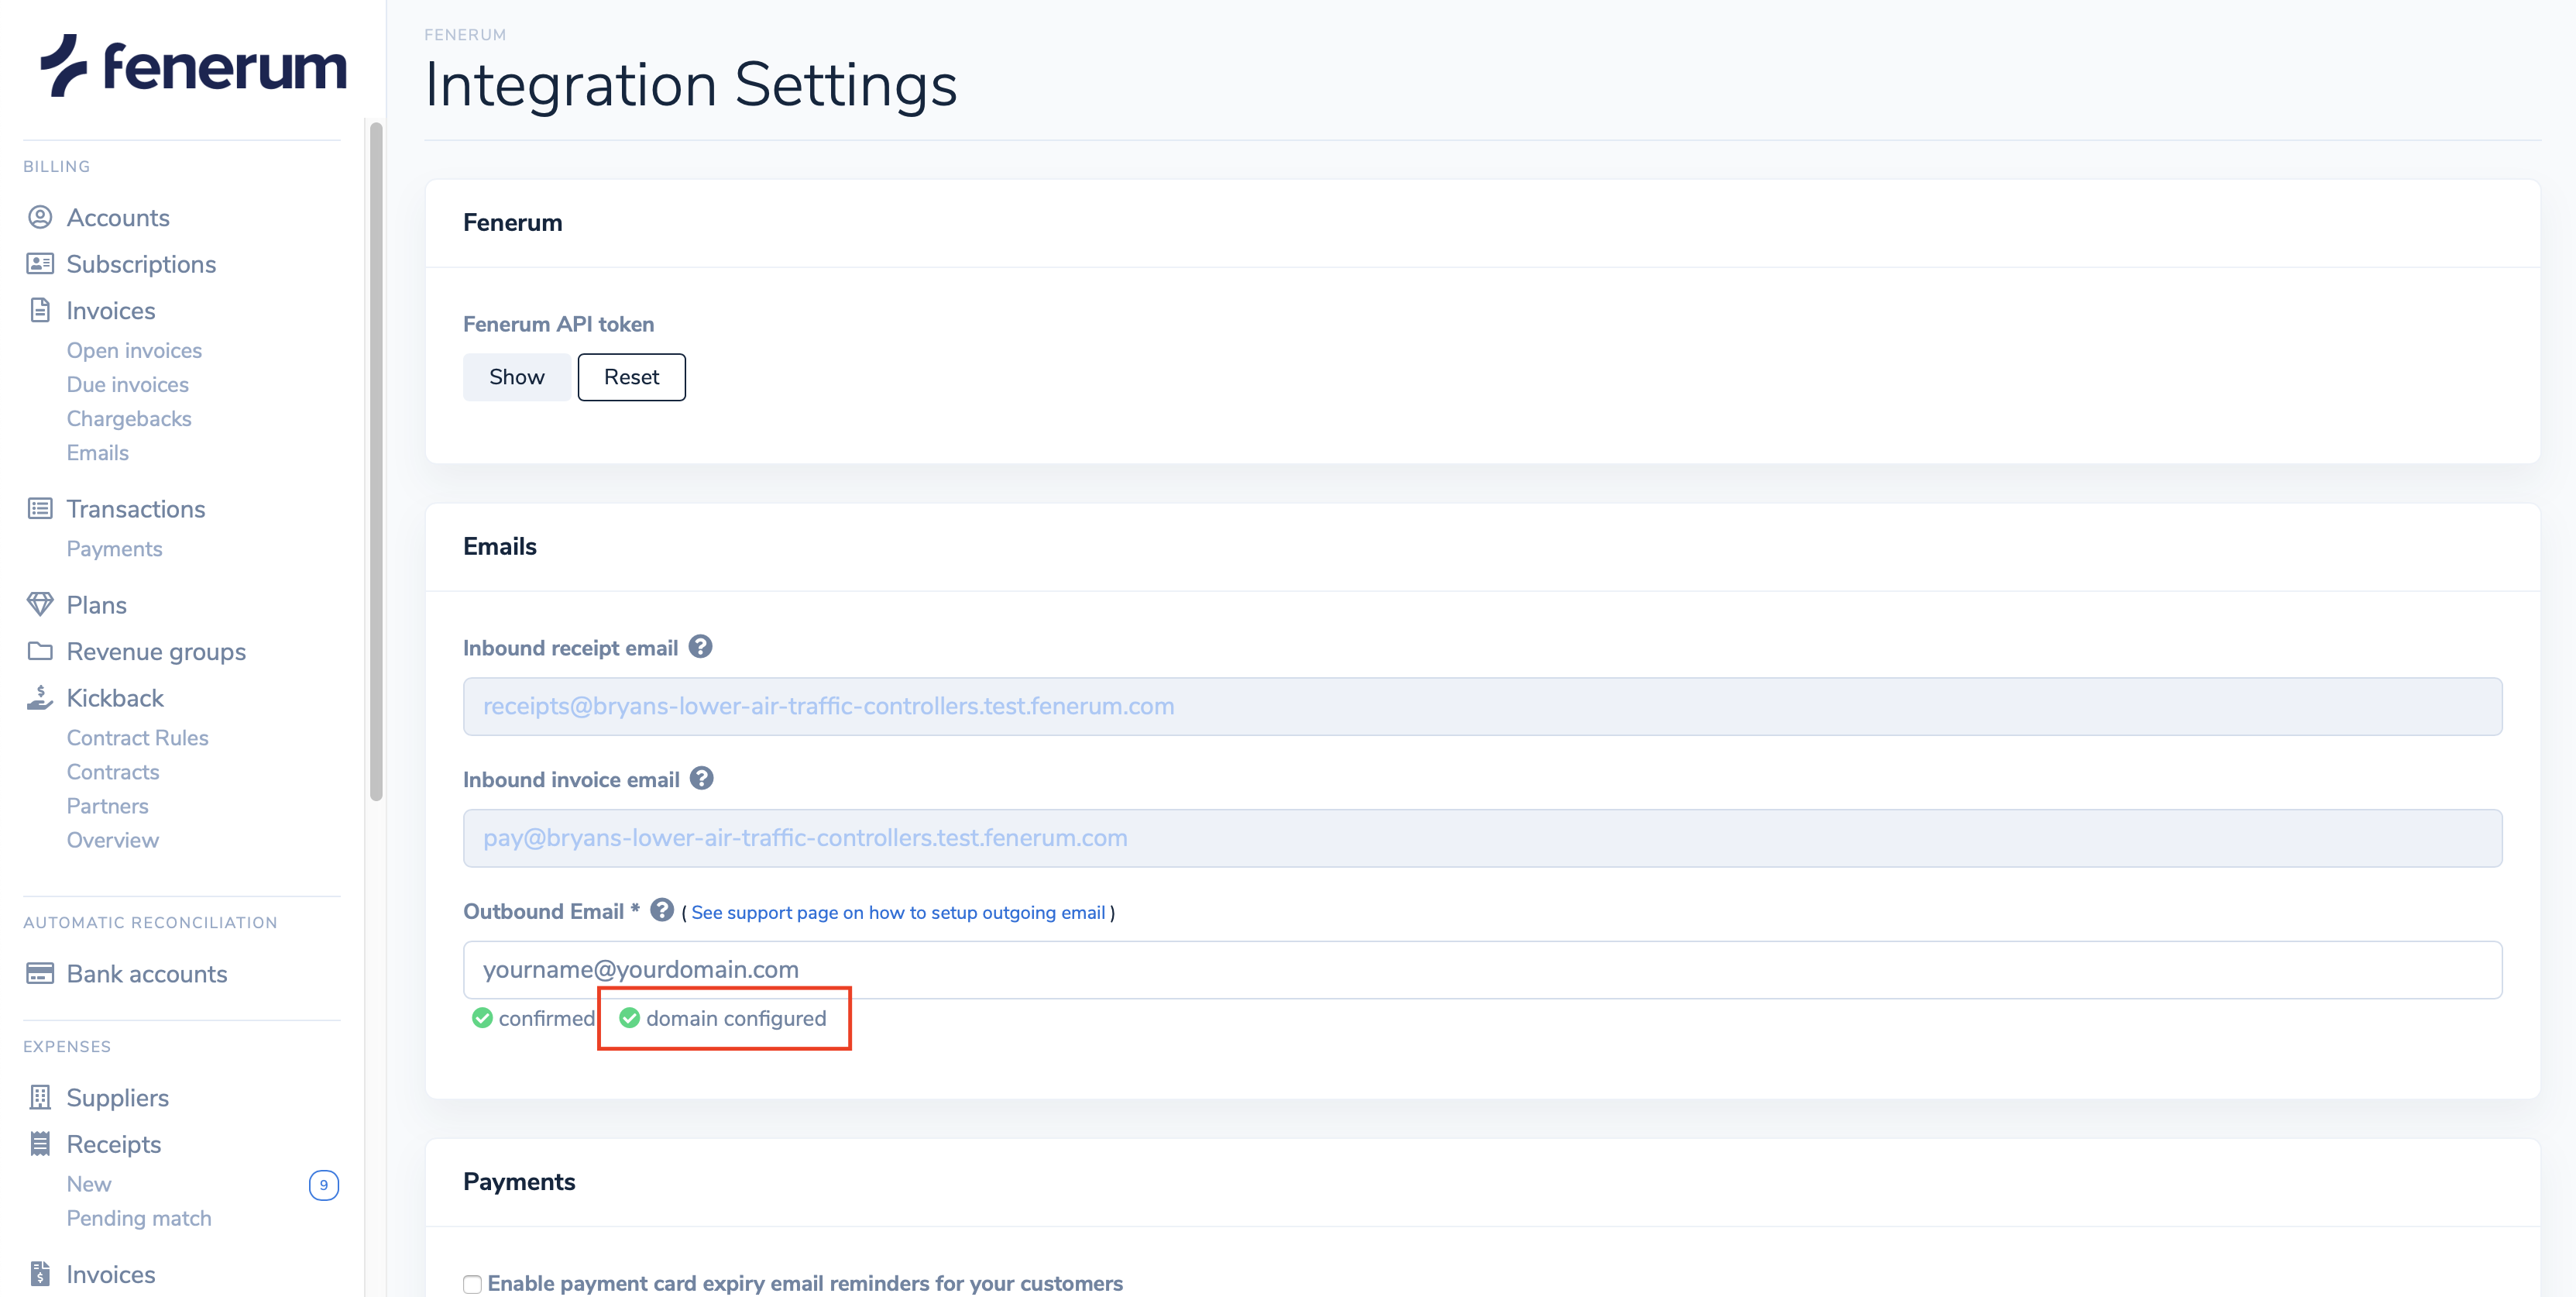
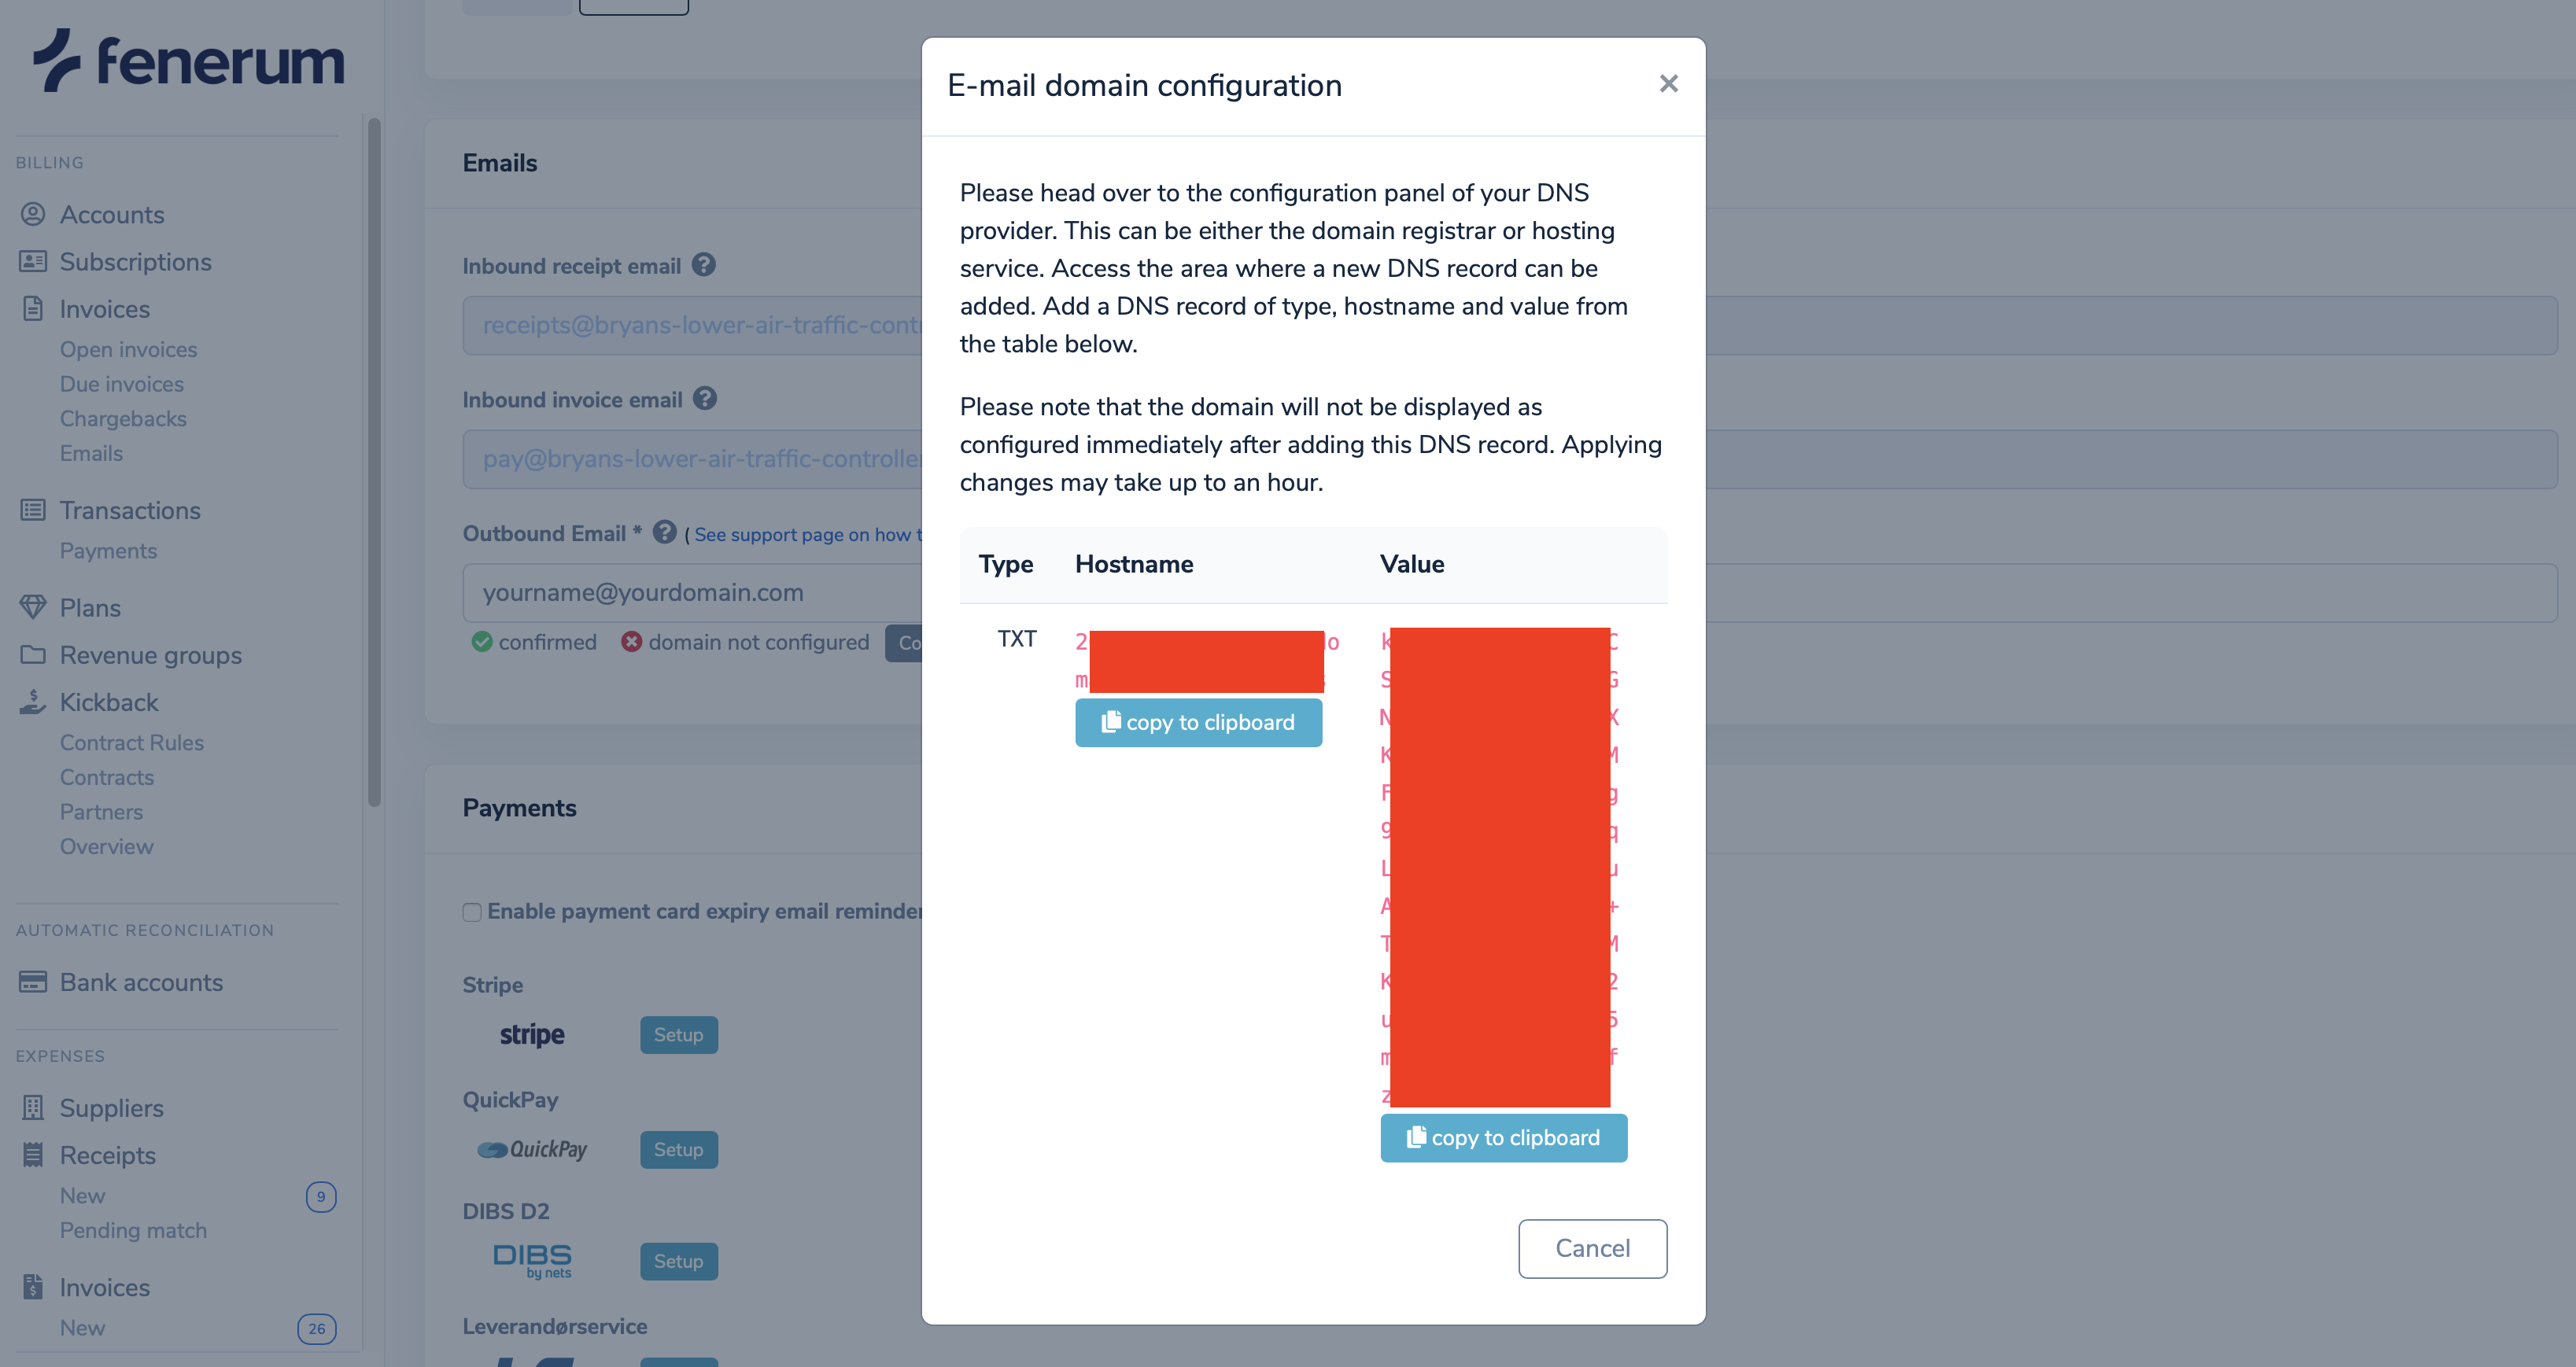 A few minutes later check the domain configuration status in the Integration settings page. It should say "domain configured". In some cases applying changes may take up to an hour.
 Well done! Now you have your outgoing e-mail address up and running. 👍
